


The Ultimate Resource for Plasterboard Wall Installation: Tools, Materials, and Best Practices
Plasterboard wall installation has become an essential part of modern construction and interior design. Whether you are building a new home, renovating an old property, or improving the energy efficiency of your living space, plasterboard offers a clean, smooth, and versatile solution for walls and ceilings. This guide will walk you through everything you need to know about plasterboard wall installation, including the tools, materials, and best practices to ensure a professional finish.
Understanding Plasterboard and Its Uses
Plasterboard, also known as drywall, gypsum board, or sheetrock, is a panel made from gypsum plaster pressed between two sheets of paper. It is commonly used to create interior walls and ceilings because of its ease of installation, cost-effectiveness, and ability to deliver a seamless finish once painted or decorated.
Plasterboard wall installation is ideal for both residential and commercial projects. It provides excellent fire resistance, sound insulation, and thermal performance depending on the board type. By selecting the right plasterboard for your project, you can significantly improve the comfort and safety of your indoor environment.
Tools Required for Plasterboard Wall Installation
Having the correct tools is essential for a smooth plasterboard wall installation process. Below are the key tools you will need:
Measuring and Marking Tools
- Tape measure for accurate measurements of walls and ceiling areas
- Spirit level or laser level to ensure walls are perfectly straight
- Pencil or chalk line for marking cut lines and stud positions
Cutting Tools
- Utility knife for cutting straight lines in plasterboard
- Keyhole saw or jab saw for cutting openings for sockets, switches, and fixtures
- T-square or straight edge for guiding cuts
Fixing Tools
- Cordless drill or screwdriver for attaching plasterboard to studs
- Drywall screws and screw gun bits for secure fixing
- Hammer and nails (optional, depending on the system used)
Finishing Tools
- Jointing knife and taping knife for applying joint compound
- Sanding block or pole sander for smoothing surfaces
- Mixing bucket and paddle mixer for preparing compound
Safety Gear
- Dust mask to prevent inhaling gypsum dust
- Safety glasses to protect eyes during cutting and sanding
- Gloves to reduce risk of cuts when handling sharp tools or board edges
Materials Needed for Plasterboard Wall Installation
Along with tools, the right materials are crucial for achieving strong, durable walls. Some of the most important materials include:
Plasterboard Sheets
Different types of plasterboard are available for specific purposes:
- Standard plasterboard for general walls and ceilings
- Moisture-resistant plasterboard for bathrooms and kitchens
- Fire-rated plasterboard for enhanced fire protection
- Soundproof plasterboard for improved acoustic insulation
- Insulated plasterboard for better thermal performance
Fixings
- Drywall screws in various lengths depending on board thickness
- Adhesives for fixing plasterboard directly to masonry walls (dot and dab method)
- Nails or clips (in some systems)
Jointing Materials
- Paper tape or mesh tape for reinforcing joints
- Joint compound for sealing gaps and smoothing joints
- Corner beads to strengthen and finish corners
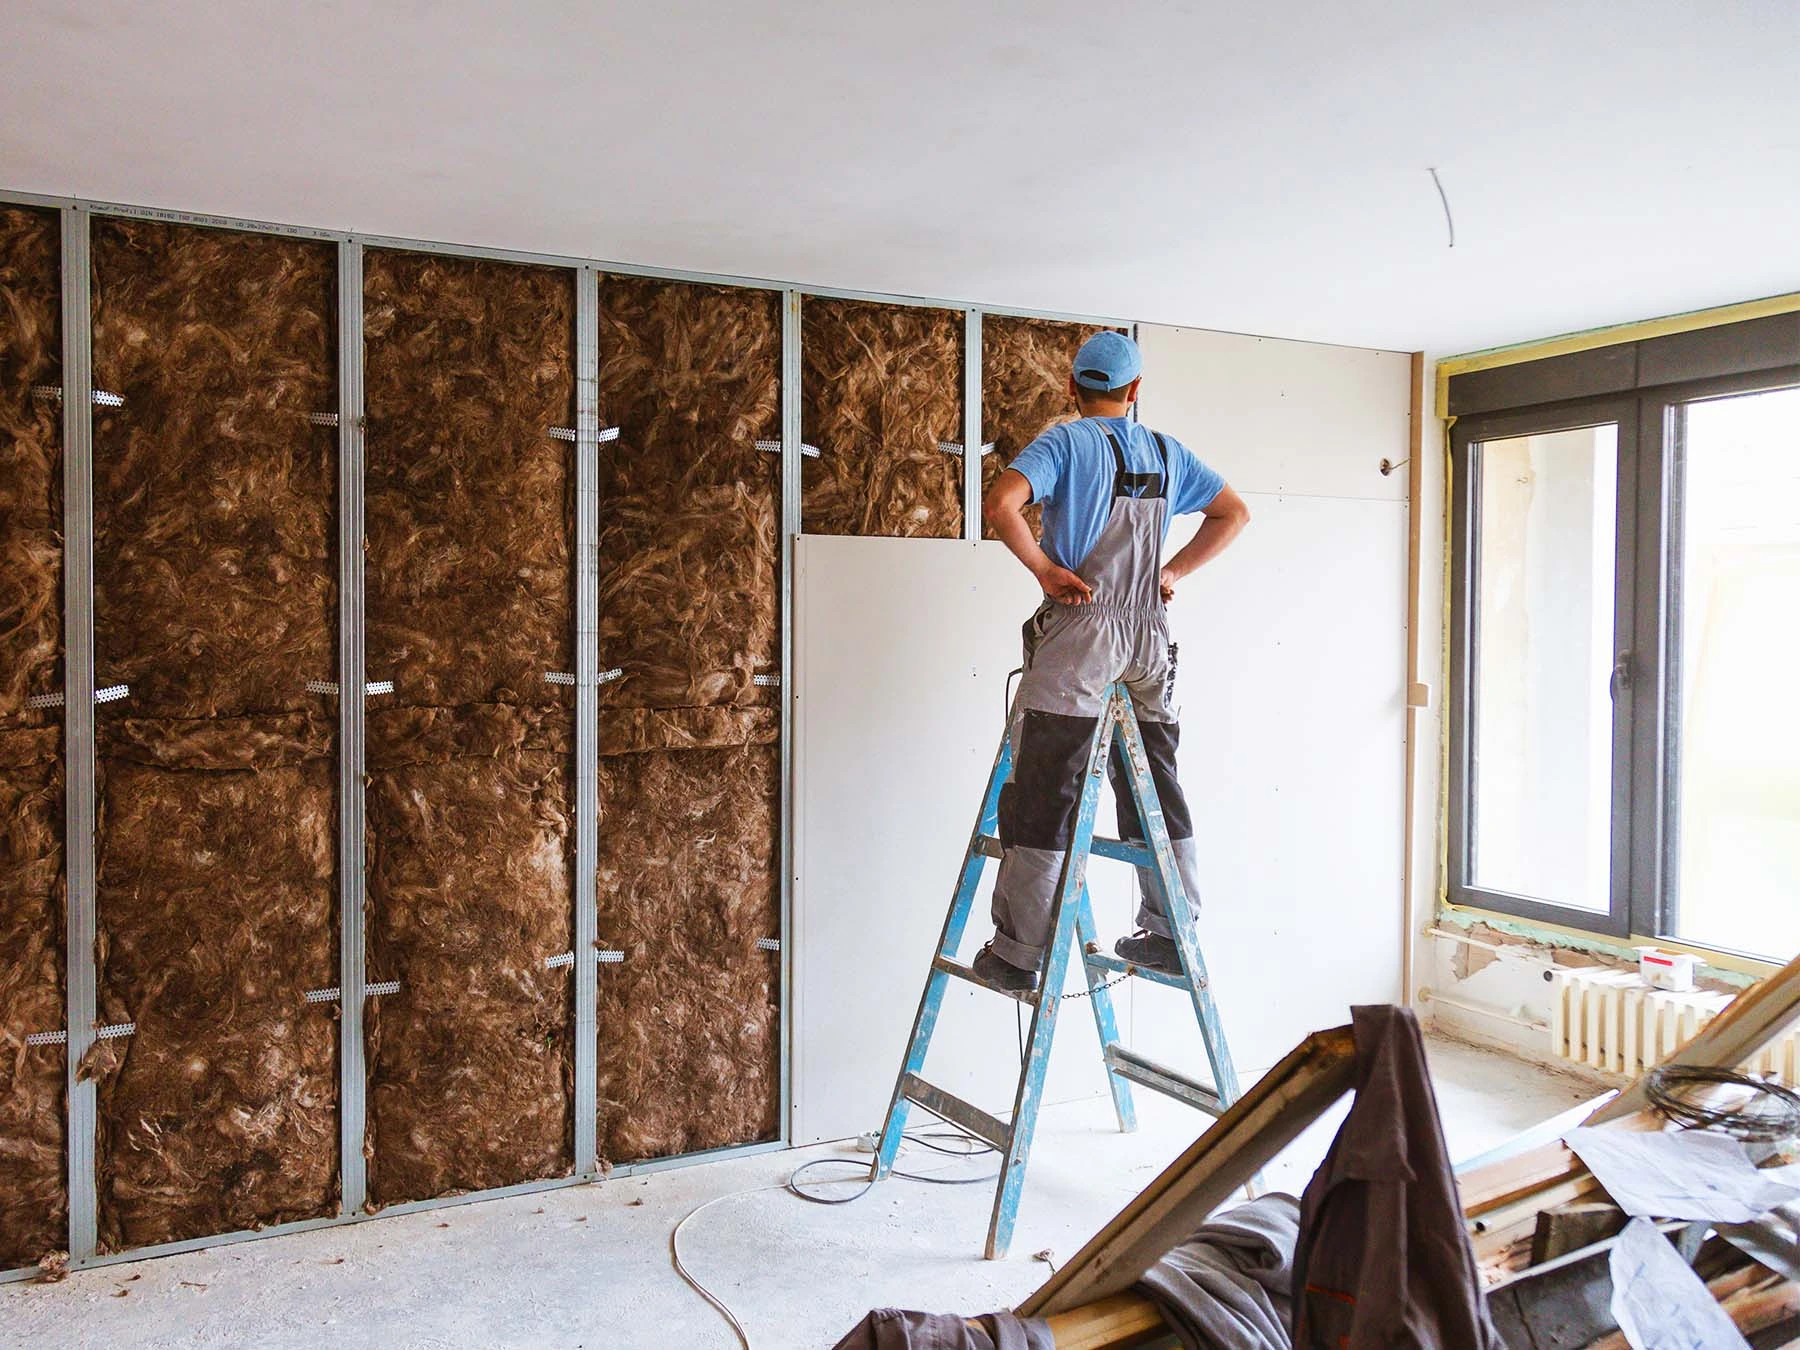
Insulation (Optional)
For additional thermal or acoustic benefits, mineral wool or foam board insulation can be installed behind the plasterboard.
Step-by-Step Guide to Plasterboard Wall Installation
To achieve a professional finish, follow these best practices during plasterboard wall installation:
Step 1: Preparation
Clear the working area and ensure walls or stud frames are clean, dry, and free from debris. Plan your layout carefully, noting where joints will fall and ensuring they are staggered for greater strength. Mark stud positions clearly on the floor and ceiling for reference when fixing boards.
Step 2: Measuring and Cutting
Measure the required size of each plasterboard sheet and mark cutting lines using a T-square. Score the face paper with a utility knife, snap the board along the line, and cut through the back paper. For openings such as electrical sockets, measure carefully and cut with a keyhole saw.
Step 3: Fixing Plasterboard to Studs
Position the plasterboard sheet against the frame and fix it using drywall screws. Start in the middle of the board and work outward, ensuring screws are driven just below the surface without breaking the paper. Maintain a screw spacing of approximately 150mm along edges and 200mm in the center.
Step 4: Dot and Dab Method (Alternative)
For masonry walls, plasterboard can be fixed using adhesive. Apply dabs of adhesive to the wall in vertical lines, then press the plasterboard firmly into place. Use a spirit level to check alignment. This method is quicker but requires proper curing before finishing.
Step 5: Sealing Joints and Corners
Reinforce joints with paper tape or mesh tape. Apply a thin layer of joint compound over the tape with a jointing knife, feathering out edges for a smooth transition. Allow to dry, then sand lightly before applying additional coats as necessary. Corner beads should be installed on external corners and covered with compound for strength and neatness.
Step 6: Sanding and Finishing
Once joint compound is dry, sand carefully to achieve a flat surface. Prime the plasterboard with a suitable sealer before painting or wallpapering. This prevents uneven absorption and ensures a flawless decorative finish.
Best Practices for Plasterboard Wall Installation
To ensure a long-lasting and professional result, keep the following best practices in mind:
Proper Handling and Storage
Plasterboard sheets should be stored flat in a dry area to prevent warping. Handle carefully to avoid damaging edges and corners, which can lead to poor joints.
Staggered Joints
Avoid aligning vertical joints on adjacent boards. Staggering joints increases wall strength and prevents cracks.
Ventilation
When sanding or cutting, ensure proper ventilation to minimize dust buildup. Using a dust extractor with power tools can also improve safety and cleanliness.
Moisture Control
In bathrooms, kitchens, and laundry areas, always use moisture-resistant plasterboard. Standard plasterboard is vulnerable to water damage, leading to mold and structural issues.
Finishing Touches
Take extra time with jointing and sanding. A poor finish will be highly visible once painted. Use multiple thin coats of compound rather than one thick coat for better results.
Common Mistakes to Avoid in Plasterboard Wall Installation
Even experienced DIYers and contractors can make mistakes during plasterboard wall installation. Some common issues include:
- Overdriving screws and breaking the paper face, reducing holding strength
- Failing to seal joints properly, leading to cracks
- Using the wrong type of plasterboard in high-moisture areas
- Ignoring uneven frames, which causes gaps or bowed boards
- Rushing the finishing process, resulting in visible seams under paint
By avoiding these errors, you can save time, reduce costs, and achieve a professional-quality wall.
Conclusion
Plasterboard wall installation is a versatile, practical, and efficient way to create modern interior spaces. With the right tools, materials, and techniques, both professionals and DIY enthusiasts can achieve strong, smooth, and attractive walls. Whether you are building a partition wall, upgrading insulation, or renovating a room, plasterboard provides the foundation for a flawless finish. By following the step-by-step guide and best practices outlined in this resource, you can ensure a high-quality result that stands the test of time.